
If you transfer files and data online quite often, you might’ve heard about Filezilla. This popular FTP software is well-known for its security and, of course, the no-cost exchange of files.
The best advantage of this server is reliability, quick transmission, and cross-platform compatibility. It can also be defined as a web-based server that supports FTP, FTP over TLS (Transfer Layer Security), and SFTP (SSH File Transfer Protocol).
Filezilla has lots of functionalities, including remote data transfer. However, many users have no idea how to connect Filezilla to SFTP. This is why we have drafted this article to help you understand how to use Filezilla with the private key.
What is a private key in FTP?
To give you an outline, the private key is an authentication key used by the client when connecting to an SFTP server. This private key is secretly stored on the user’s PC to encrypt sensitive data and confidential files from malware attacks and hackers.
Also Read:What is FTP & How to Create an FTP Account In cPanel?
Steps For Setting Up SFTP With Private Key
Now, to function SFTP using a private key, you are supposed to have two requirements –
First, you need to install the FileZilla Client installed on your device Second, you need to have the private FileZilla ssh key for integrating with the FileZilla Client.
Step-1
Once you have FileZilla on your system. There are 3 ways to start the FileZilla server.
- Run the software by clicking on the Windows button on your keyboard. Type FileZilla and click on the icon to start the process.
- Double tap the FileZilla software if it is already on your desktop screen.
- Another way is Microsoft’s default command line tool (cmd.exe) or PowerShell.
Also Read:How to check if FTP port 21 is blocked
Step-2
To set up the FileZilla ssh key, you mainly have to follow three steps.
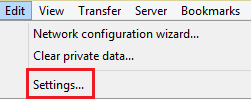
- After logging the FileZilla software, an interface will appear on your screen. In the top left corner, you will find the Edit option. Hover the cursor on it, and click on the settings as the drop-down menu appears.
- Next, select the SFTP and click on ‘add the key file’ under the ‘settings’ options.
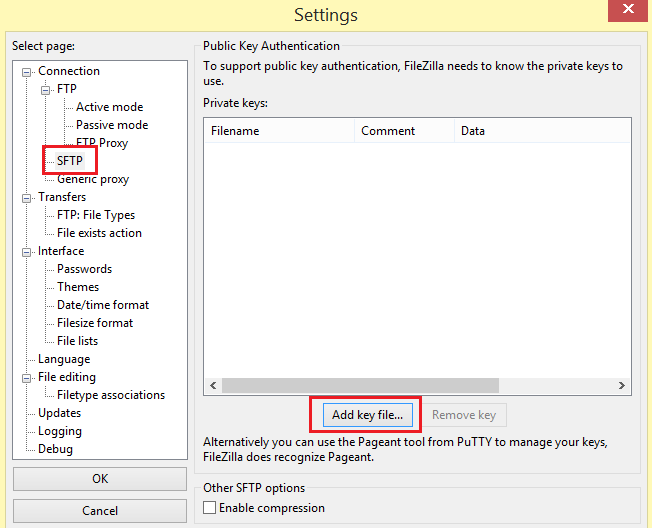
- Choose the private key file from the FileZilla public key authentication list.
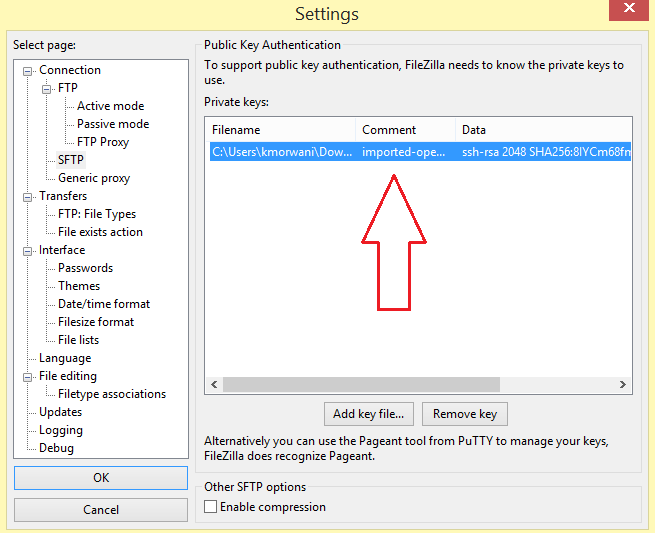
- Enter your password and click the ‘OK’ button to save the changes.
Additional Tip – There are possibilities of FileZilla converting your private key, as it may need to be in the correct format that FileZilla supports. However, you don’t have to worry! You can change the key anytime you want.
Also Read:How to Download My Full Website From cPanel as a Backup
Step-3
After saving the private key, the last step is entering the details of the host, username, and port (if it is not the default). Finally, press the Quickconnect bar to set up your FileZilla ssh connection.
To Conclude
We hope this article makes it easy for you to configure FileZilla with SFTP. Here’s an important tip: Guard and handle your private key carefully. Keep the key on the device it was generated on. Ensure to store it in a secure key vault or hardware security module (HSM) to share confidential files seamlessly.