We all know WordPress is one of the easiest platforms for creating and operating a website. From adding content to downloading plugins, site management is a cakewalk. This includes interactive themes. Installing and altering themes is possible directly, thanks to the WordPress dashboard.
Let’s imagine one day; you are unable to upload a new theme through WordPress due to site issues or inaccessibility of the WordPress dashboard.
What would you do then?
Don’t hype your anticipatory anxiety instead, focus on learning the alternative.
Yes, you read it right. Besides accessing the WordPress dashboard from cPanel, installing and managing themes are possible through cPanel. Changing themes from cPanel is as easy as it is from WordPress. Plus, learning new things is never a bad idea.
If you are facing any of the above issues or want to acquire knowledge, continue reading this blog as we answer how to activate the WordPress theme from cPanel.
Also Read: How to Install a PHP Script in cPanel?
Steps to Activate WordPress Themes via WordPress Softaculous in cPanel
Step-1: Login to cPanel by adding your credentials.

Step-2: Once you log in to your account, scroll down to the ‘Software’ section and click ‘WordPress Manager by Softaculous.’

Step-3: Upon opening the ‘WordPress Manager by Softaculous,’ you will find a navigation arrow in the window’s top right corner. Click on it

Step-4: After opening, Tap on ‘Manage Themes’ from the options.

Step-5: After clicking the Manage themes, a new window will be popped on your screen, which will include the ‘Installed’ option at the top left corner.
The installed section will show you a list of pre-installed themes with a status column. The ‘status’ column illustrates which themes are activated and which ones are deactivated.
Besides your existing theme, other themes will be deactivated. So you can swipe the button of the theme you want to activate.

Step-6: Upon swiping the toggle, you will be notified about installing a new theme. As for your existing theme, it will be automatically turned off.

These were the steps on how to activate a theme in cPanel, Softaculous edition!
Also Read: Ultimate Guide to Fix Internal Server Error in WordPress
In case you want to Install a new theme, stay on ‘Manage Themes’ and click ‘Add Themes’.

Type down the name of the theme you want to download in the search bar right below the ‘Add Themes’ option.

A list of options will appear relating to the same name of the theme. Click on the ‘Install’ button once you find the preferred theme.

If you want to know how to upload a theme in cPanel, start by staying on the manage themes window and clicking on the last option, ‘Upload Theme’. A window with a drag-and-drop file option will be shown on your desktop.

All you need to do is drag a desired theme that you might have downloaded previously on your desktop and drop it in the box displayed on the screen. You can also click on the box to directly select the theme from the folder you saved.
Also Read: How to Upload HTML Files to Your WordPress Website?
Steps to Activate WordPress Theme Via File Manager in cPanel
Step-1: Login to cPanel

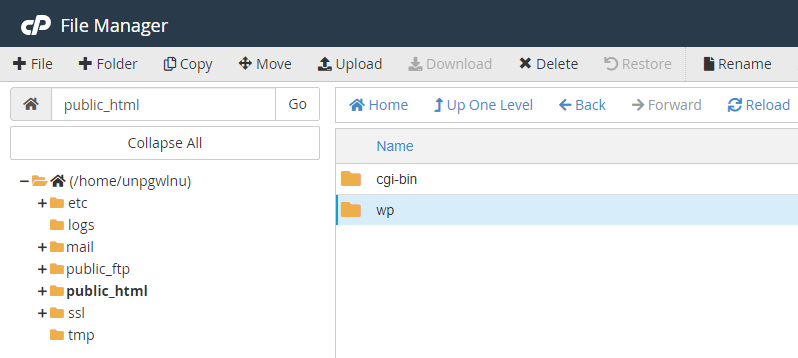
Step-2: Scroll to ‘Files’ and click ‘File Manager’.

Step-3: In the File Manager page, search for the ‘public_html’ directory.

Step-4: you will find a folder named ‘wp-content’. Click on that folder, and a list of folders will appear on the screen.

Step-5: In that click on ‘wp-content’ & Find ‘Themes’ among the folders and click on it.

Step-6: Find ‘Themes’ among the folders and click on it.

Step-7: Upon opening the folder, you will notice multiple folders of your active and deactivated WordPress themes will be listed on your screen.

Step-8: To know how to upload a WordPress theme via cPanel, head to the top center bar.
Step-9: At the top, you will find a ‘Upload’ section.

Step-10: Upon hitting the upload button, a new pop-up window will appear on your screen with a box for dropping or uploading a file.

You can upload the file by clicking on the ‘Select File’ option or dragging the file from its original location to this ‘file upload box’ is also possible.

Step-11: Once your file is uploaded, head back to the previous page consisting of your existing themes. Refresh the page, and you will notice a new ZIP file appearing in the list.

Step-12: Right-click the ZIP file and select the ‘Extract’ option from the sub-menu.

Step-13: Upon clicking the extract option, a pop-up window will appear on the screen. This pop-up window will ask you to input a path wherein you will save this file, which in this case is ‘public-html/wp/wp-content/themes’.

Step-14: Once you input the destination for the file, click on ‘Extract File(s)’ and press of cross mark at the top left corner of the pop-up window.

Step-15: Upon completion of the extraction process, refresh the themes page. After the refresh, a folder will appear in the theme list. Stating that you have successfully uploaded a WordPress theme on your cPanel.

Also Read: How to Install SSL on WordPress
Conclusion
Hope this blog solved the purpose of your search. You might be wondering that the steps are a bit too long and intensive. However, it’s a breeze even for the first-timers. This process will especially become easier when you get with cPanel and its structure.
