
Introduction
Apache Tomcat is an open-source web server and servlet container that allows you to run Java-based web applications. It is widely used for deploying Java Servlets and JavaServer Pages (JSPs).
If you are new to the world of Tomcat, think of it as a bridge between your Java code and the web browser that helps your Java applications communicate with users over the internet.
This guide will walk you through installing and starting the Tomcat server on a Windows system. Even if you are a beginner—this guide is simple and easy to follow!
Also Read: Install Remote Server Administration Tools on Windows 10?
➢ Steps to Install Tomcat in Windows
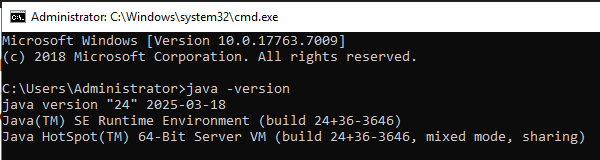
Firstly, since Tomcat runs on Java, you need to have Java installed on your Windows. You have to follow these steps to check if Java is installed on your system:
➔ Open Command Prompt (By pressing Win + R, type cmd, and hit Enter).

➔ You have to type the following command and press Enter:
| java -version |
➔ If Java is installed, you will see an output similar to:
If Java is not installed on your Windows, you have to download and install it from the official Oracle JDK website.
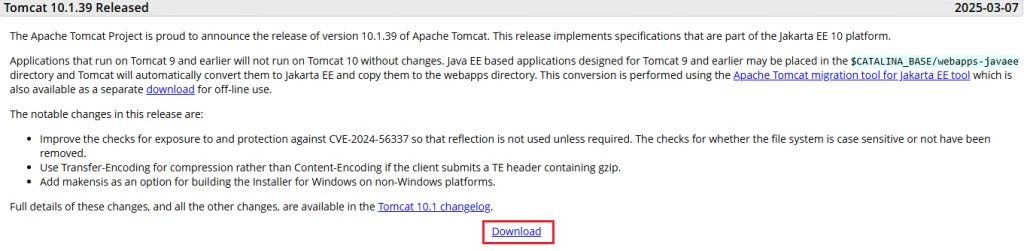
➔ Once you download & install the Java, it’s time to download the Tomcat. To do this, you have to visit the official Apache Tomcat website.
➔ You have to click on the Download section and select the latest stable version of Tomcat.
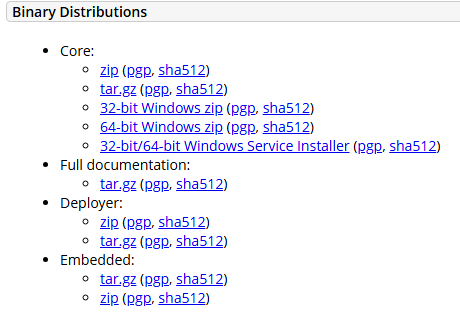
➔ In that, scroll down to the ‘Binary Distributions’ section and download the ‘Windows zip file’ or the ‘Windows Service Installer (.exe).’
➔ Once it’s done, you need to install the Tomcat. For this, we are going to explain both ways:
- Using the ZIP File
- Using the Windows Service Installer (.exe)
■ Using the ZIP File
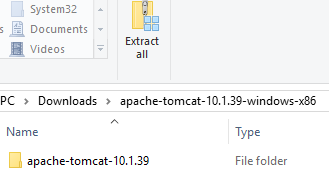
➔ First, extract the downloaded ZIP file to a location on your system.
➔ To set up an environment variable by specifying the Tomcat directory, you need to Right-click ‘This PC’ in the file manager.
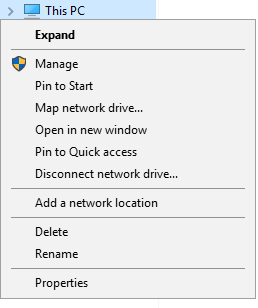
➔ In that, select ‘Properties.’

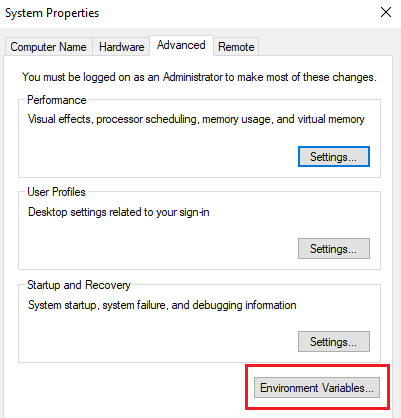
➔ A new tab will appear. In that, you have to click on ‘Advanced system settings.’

➔ Once clicked, Another tab will open. In that, you have to click ‘Environment Variables.’
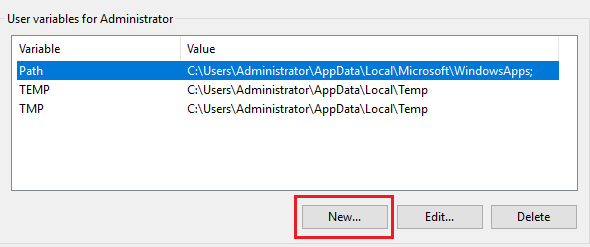
➔ Under ‘System Variables’, you have to click ‘New.’
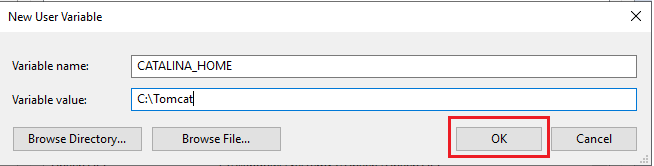
➔ In that, enter:
- Variable name: CATALINA_HOME
- Variable value: C:\Tomcat (or your extracted directory)

➔ Once done, click ‘OK’ to save changes.
■ Using the Windows Service Installer (.exe)
➔ You need to run the downloaded .exe file.
➔ In that, follow the installation wizard:
- Just accept the License Agreement.
- Select components (leave default selected options).
- Choose an installation directory (default: C:\Program Files\Apache Software Foundation\Tomcat).
- Set up an admin username and password (for the Tomcat Manager web interface).
➔ Once it is installed, you can start Tomcat using the Monitor Tomcat utility available in the Start Menu.
That’s it; your Tomcat has been successfully installed on your Windows!
It’s time to start the tomcat on the Windows!
Also Read: How to Install GCC Compiler on Windows?
Steps to Start Tomcat on Windows
To start the Tomcat server on Windows 10, you can use either the Services window or the Command Prompt. Make sure Tomcat is installed and set up properly.
➢ Using the Services Window:
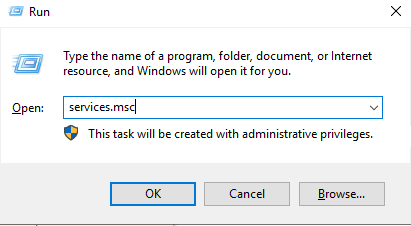
➔ Open the Services window by typing ‘services.msc’ in the Windows search bar and pressing ‘OK.’
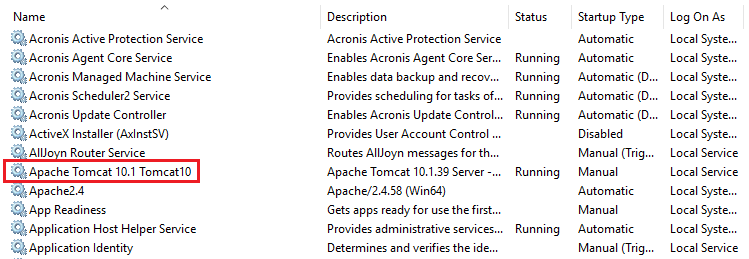
➔ Find the Tomcat service: Look for Apache Tomcat X (the name may vary based on your installation).
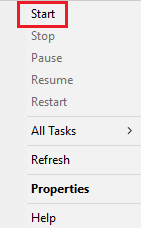
➔ To start the service, just Right-click on it and select ‘Start.’
➢ Using the Command Prompt:
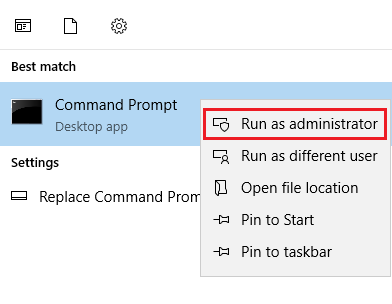
➔ You have to open the command prompt as an administrator by searching for “cmd” in the Windows search bar.

➔ You need to right-click on ‘Command Prompt,’ and select ‘Run as administrator.’
➔ In that, navigate to the Tomcat bin directory using the cd command to navigate to the bin directory within your Tomcat installation.
| cd C:\path\to\your\tomcat\bin |
➔ To start the Tomcat service, Run the following command:
| startup.bat |
Also Read: What is Telnet Command in Windows & How to Use it?
Conclusion
We have to say Congratulations to you!
You have successfully installed and started the Apache Tomcat server on your Windows machine. Now, you can deploy and test your Java applications with ease.
Happy coding!

Host your website or app on Windows VPS at Pocket-friendly costing!