
In today’s digital age, safeguarding your valuable data is paramount. Acronis backup solutions offer robust protection for critical information against unexpected disasters or data loss.
Setting up a protection plan with Acronis ensures reliable backups and a streamlined recovery process. Whether protecting personal files or managing business data, this guide will walk you through the steps to create and configure a protection plan using Acronis’ intuitive Management Console.
Let’s dive into the essential steps to safeguard your online project!
Also Read: How to Backup a Website Using Filezilla?
Steps to Create a Protection Plan
This article discusses how to create a backup plan for a device. To do this, follow the following steps:
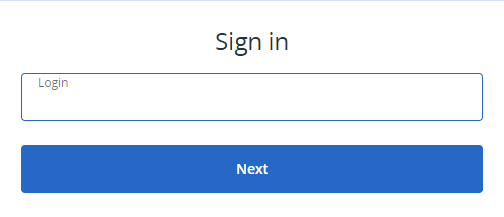
- ➜ Log in to your Acronis account through the Acronis Management Console using your username & password.
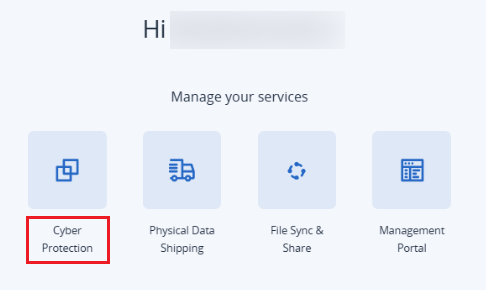
- ➜ On the Welcome page, you will see four options to manage your services. Click ‘Cyber Protection’.
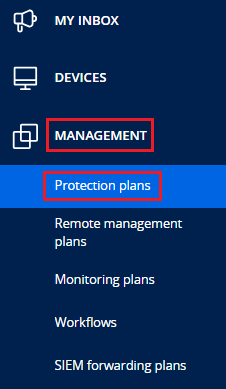
- ➜ In the Cyber Protect web console, go to the left-hand menu under ‘Management’ and select ‘Protection Plans’.
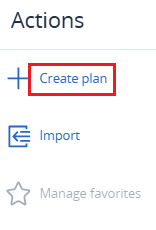
- ➜ A sidebar will open on the right side. Click ‘Create Plan’.
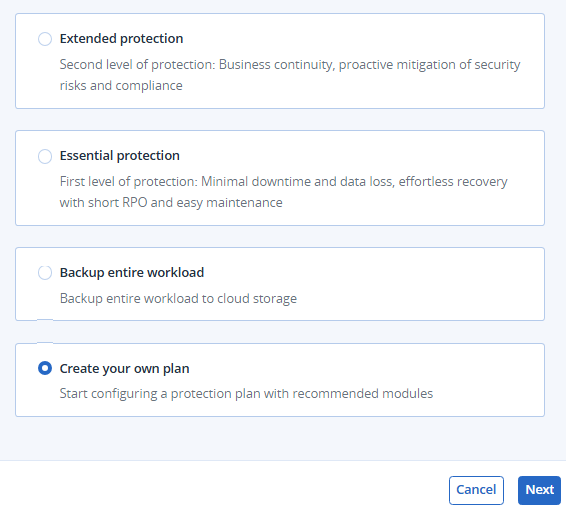
- ➜ You will see multiple options for creating a protection plan. Select ‘Create Your Own Plan’ and click ‘Next’.
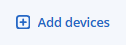
- ➜ Click ‘Add Devices’.
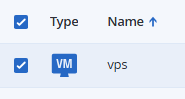
- ➜ Choose your server named ‘VPS’ and click ‘Add’.
You will now see the main configuration page, where you can customize the backup settings according to your requirements.
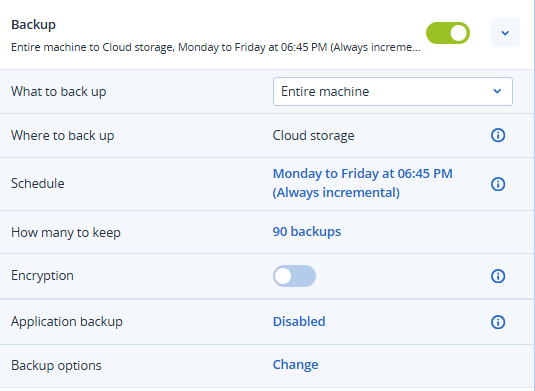
- ➜ Under ‘What to Back Up’, choose the data you want to protect. Available options include:
- Entire Machine
- Disks
- Folders
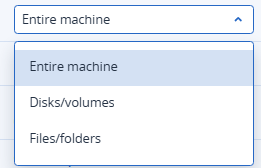
Select the option that best suits your requirements.
- ➜ Next, select where you want to store your backups.

- If you choose ‘Entire Machine,’ you will have the option to store backups in ‘Cloud Storage.’
- For other backup types, you may be able to specify a custom storage path.
- ➜ Set the backup schedule according to your needs. You can run backups:
- Hourly
- Daily
- Weekly
- monthly
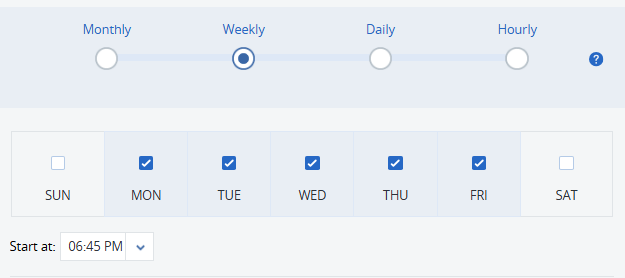
Choose the frequency that best matches your recovery requirements.
- ➜ Under ‘How Many Backups to Keep’, specify the maximum number of backup versions to retain.
The default retention setting is 90 backups, and this is also the recommended value.

- ★ Once the retention limit is reached, older backups will be automatically removed to make room for new backup versions.
Also, you can choose whether to start the cleanup before or after the backup is taken.

➔ Once all the details added, you have to click ‘Create’ button.
That’s it! Your Acronis protection plan is now successfully configured, and backups will run according to the schedule you selected.
Also Read: How to backup your Mysql database with phpMyAdmin?
Conclusion
By following these steps to back up in the Acronis solution, you can ensure that your critical data remains secure and accessible, minimizing the impact of potential data loss incidents. Regular maintenance and testing of backup and recovery processes are essential to maintaining the effectiveness of your protection plans over time.