
We cannot stress enough on the subject of Backup. It has been and will always be a priority for web owners to ensure they have a backup ready in case of data loss or the website being taken down. If you are not taking regular site backups, dear reader, you are certainly making a big mistake.
While website backups can be taken from cPanel, there is a way to manually back up your website files using FTP which we will explain in this blog post. So, without further ado, let’s jump right into the process.
Why Website Backup is Important?
Everyone makes mistakes. Some can be overlooked, while others can be a major concern that needs to be addressed and solved immediately. This entire scenario is also closely associated with the website’s backup.
You may accidentally delete important files and documents. A website backup can be a blessing in disguise. If you have the latest backup of your website, you can upload it.
Assuming that you are now aware of the significance of website backup. Let’s jump to the topic of how to back up a website using FileZilla.
How To Take A Backup From FileZilla?
Below is a straightforward process to create a backup using FTP –
The most common and initial step is setting up FileZilla and connecting with the FTP server.
1. Login Process
Step: 1 – After Installing Filezilla, start with the setup process and connect it to the FTP server of your hosting account.
Step: 2 – Once the connection is established, Enter the “Host”.
Step: 3 – Write your cPanel Username & Password.
Step: 4 – Write 21 in the port number. This is a default value mentioned here. However, you don’t have to specifically mention the same. You can skip the section and click “Quickconnect” to log into your FTP account.

Also Read: How To Search Files In FileZilla?
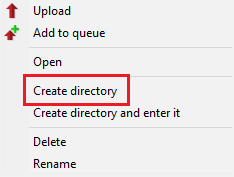
2. Creating Directory
Step: 5 – After the login, select the “Desktop” option from the taskbar at the top left corner of FileZilla.

Step: 6 – Upon Right Click on it, you will see a “Create directory” option. Click on it and create a directory name of your choice. For Example, We are keeping its name as “Backup”
Also Read: How To Get FTP Password From FileZilla
3. Backup Process
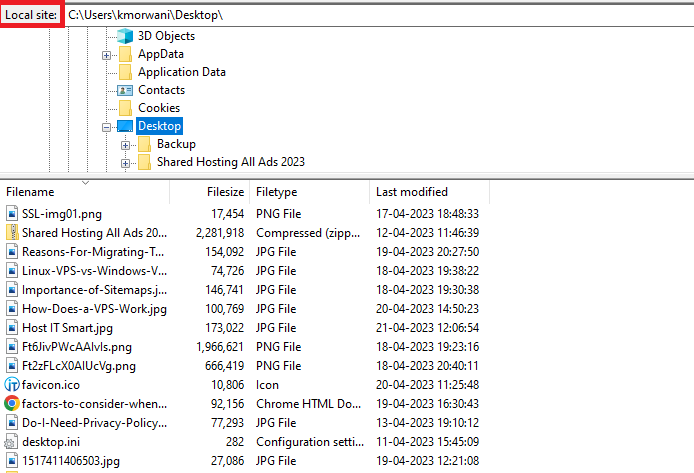
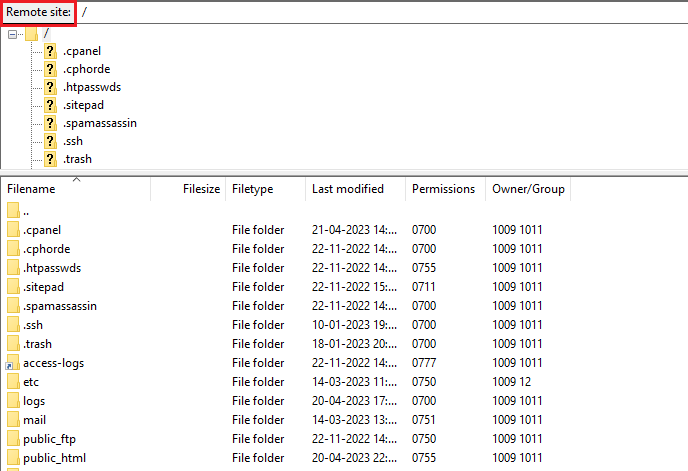
Step: 7 – After creating the directory, you will see two sections below. The first is a “Local site”, and the other is a “Remote site”.
Local site
Remote site
Step: 8 – Select the newly created directory. In our case, it’s a “Backup” file where we will keep all data as a backup.

Step: 9 – Navigate your cursor to the remote site to select all your website files. You can also select individual files by holding the “CTRL” key on your keyboard and selecting the files you want by clicking the left mouse button.

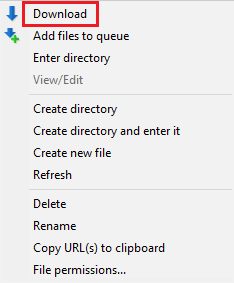
Step: 10 – After selecting the files, right-click on your mouse, and you will see a shortcut menu pops up on your screen.

Step: 11 – Select “Download” from the shortcut menu.
Congratulations! The Backup process is now done!