
Highlights
- Err_name_not_resolved means your browser couldn’t find the website because the domain name didn’t connect to the right server.
- This error occurs because of the wrong URL, DNS issues, slow or unstable internet connection, cookies, or caching issues.
- You will get a complete step-by-step solution to resolve this issue.
“Err_Name_Not_Resolved” is known to be one of the most common errors, and if you are currently experiencing this headache, you are certainly not alone. There are multiple Chrome users out there who are facing a similar frustrating challenge, unaware of what to do next.
But hey, fret not! Because you have got us!
Through this article, we will not only help you jump this roadblock but also get your browser in working order for uninterrupted web surfing with our effective solutions.
Without further ado, let’s dive deep into it.
What Does “Err_Name_Not_Resolved” Mean?

Chrome needs to decipher the IP address of the website in order to form a connection and showcase the data, but when it is unable to do so, you are displayed this error message.
What Are the Causes of the “Err_Name_Not_Resolved” Issue?
The “Err_Name_Not_Resolved” error can be exhibited for a variety of reasons, including weak or unstable internet connection from your end, issues with DNS/Domain Name System settings, or configurations from the website’s side.
Sometimes the error arises from a simple mistake of typing the wrong URL. Let’s say the website’s URL is www.hostitsmart.com, but instead, you searched for www.hotitsmart.com or www.hosttsmart.com. The missing or misspelled characters, words, or numbers in the URL can trigger this error.
Another possible explanation for the “Err_Name_Not_Resolved” error can be an antivirus or firewall. Yes, you read it right! Your security layer can disturb your browser’s attempt to form a connection with the website, causing you the error.
Besides the above reasons, blocked websites, outdated DNS cache, router or DNS server problems, malware, and browser extensions can contribute to the emergence of the “Err_Name_Not_Resolved” error.
Although, don’t worry! Every problem has a loophole; since you are reading this, you are already halfway through figuring it out. Let’s not waste any more minutes and jump right to the solutions.
Also Read: How to Fix Err Tunnel Connection Failed in Chrome
Methods to Fix the “Err_Name_Not_Resolved” Issu 1. Check Your Internet Connection |
1. Check Your Internet Connection
Always remember to check your internet connection before heading straight to other solutions. You might hold responsible to the website for the error, but little do you know it actually originated from your end. So, do test your internet connection.
You can either switch the internet connection or add multiple devices on a single network; if the error persists, it means it is from your end, and you have to switch to a different router to say goodbye to the “Err_Name_Not_Resolved” issue.
2. Clean the DNS Cache
Let’s say your internet connection is stable and not causing any trouble with you accessing the website; the next step is to clean the DNS cache. An outdated cache on your device can block your pathway to opening a website. As soon as you clear them, you can possibly get inside of the inaccessible website.
Steps to clear the DNS cache for Windows –
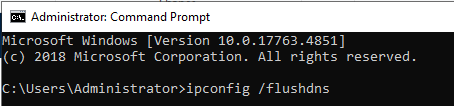
➢ Go to Windows and search the ‘Command Prompt’ app.

➢ Open the app and input the command mentioned below.
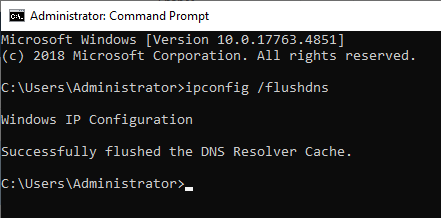
| ipconfig /flushdns |
➢ After adding the command, hit enter, and now Windows will start working on flushing out all the DNS cache. Once the cache is cleaned, you will be notified, ‘Successfully flushed the DNS resolver cache.’
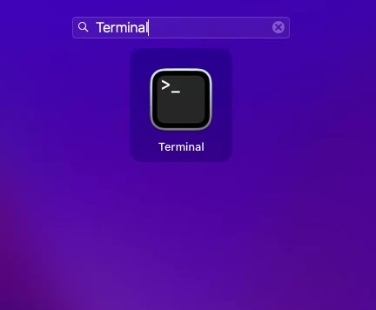
Steps to clear the DNS cache for MAC –
➢ Head straight to the launchpad icon.

➢ Now search for the Terminal.
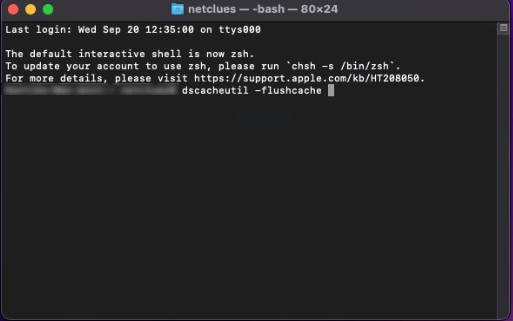
➢ Once you click the terminal, add the following command and then click enter.
| dscacheutil -flushcache |
Linux users can add this command line (sudo /etc/init.d/nscd restart) to their init.d subdirectory.
If not nscd, you can also choose the systemd method by adding the following command line into the Linux.
systemd-resolve –flush-caches
To ensure that the added command worked, input the systemd-resolve –statistics command into the Linux and press enter. It will run a quick analysis and let you know the results.
Once you are notified that the command has been executed successfully, try accessing the website to see if the error is gone for good.
Also Read: How to Clear the Website Cache in cPanel?
3. Check the Browser Settings
As previously mentioned “Err_Name_Not_Resolved” issue can be caused by numerous reasons, and faulty browser settings are one of them. Like DNS cache, the browser has its cache, too, and it should be cleaned for troubleshooting the error.
Steps to clean Chrome’s cache –
➢ Go to Chrome and add this line – chrome://net-internals/#dns into the search bar.
It will take you to the DNS lookup page, where you merely have to click the ‘Clear Host Cache’ button, and voila! All the browser’s cache is cleaned in just a few minutes.

Apart from cleaning the cache, it is suggested to check the preloading speed of the webpages, which is listed in Google Chrome’s settings.
Why to check?
When this functionality is activated, it will proactively load the data from previously visited websites that include their DNS information to accelerate their rendering speed. The important point that you should keep in mind is that this could result in the storage of outdated data, so it’s advisable to deactivate it if necessary.
Let’s get to the process!
➢ Head to Google Chrome and click on the three dots exhibited in the above right corner close to the search bar. Click on ‘Settings’ in that.

➢ Click settings, scroll down to the ‘Privacy and Security’ section, and tap on it.

➢ Take your cursor to the ‘Third Party cookies’ Section and click on it.

➢ Upon clicking, you will be redirected to a new page where you have to search for ‘Preload pages’ option.

➢ Click on the ‘No Preloading’ in that.
It is also recommended to clear your browser cache by tracing your steps back to the Privacy and Security page.
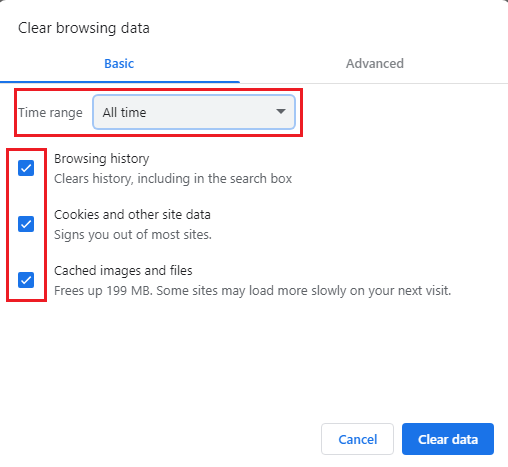
➢ Click on the Clear Browsing Data, and you will see a popup window showing on your screen.

➢ Now choose the time range to All Time, check all the boxes, and press the ‘Clear Data’ button.
After you follow all the steps we mentioned earlier, go to the website you were trying to access and see if the error still persists.
Also Read: How to Fix the 504 Bad Gateway Timeout Error?
4. Reset Your Firewall Settings
If none of the above methods seem to show fruitful results, you should consider resetting your firewall settings, as its protective layer might be inhibiting you from accessing the website, assuming that it’s a harmful or malicious website.
➢ Go to Windows, search for ‘settings’, and among the options listed, select the ‘Update and Security’ section.

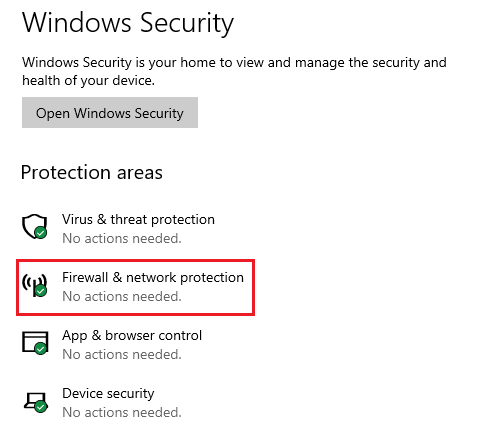
➢ You will see a list of a few sections in the ‘Update and Security’ settings. Among them, you have to click on the option ‘Windows Security’, which will redirect you to a new page.

➢ Click on the ‘Firewall & Network Protection’ option on the next page.
➢ Tap on the ‘Restore Firewalls to Default’ listed right below.

➢ Repeat the process of searching the website to check whether or not the error is gone.
Also Read: What is 406 Not Acceptable and How to Fix It?
5. Configure the DNS Server on Your Device
If you still see the error, you should configure the DNS server on your device, as there are chances of your DNS server not functioning properly, and you will need to ensure it does to resolve the “Err_Name_Not_Resolved” error.
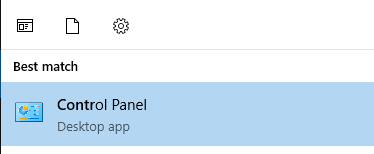
➢ Go to Windows and search for Control Panel.
➢ On the Control Panel, search for ‘Network and Sharing Center’.

➢ Click on the ‘Network and Sharing Center’, and you should see a new page with the Change Adapter Settings option.

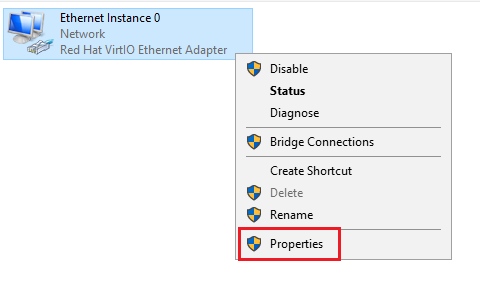
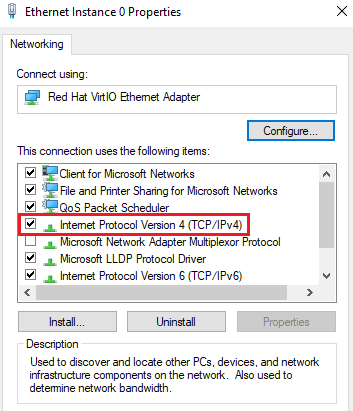
➢ Click the ‘Change Adapter Settings’ option. Find your existing network and right-click on it to click ‘properties’.
➢ On the Properties popup, you have to double-tap on the ‘Internet Protocol Version 4 (TCP/IPv4)’ or ‘Internet Protocol Version 6 (TCP/IPv6)’.
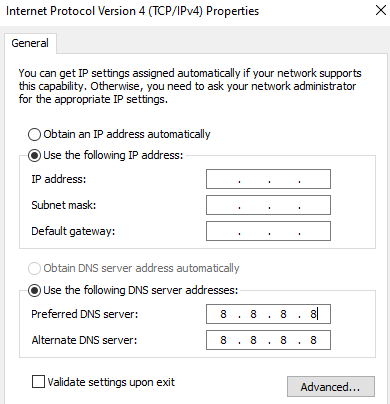
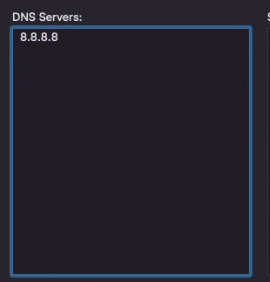
➢ Once you click on the protocol, you will see a new popup window where you have to find Use the Following DNS Server Address, and add the server address of Google.
Google’s DNS Servers –
- For IPv4: 8.8.8.8 and/or 8.8.4.4.
- For IPv6: 2001:4860:4860::8888 and/or 2001:4860:4860::8844.
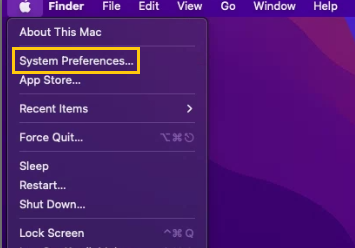
macOS Users can update their DNS server address by –
➢ Searching for Network in their System Preferences.
➢ Click on the ‘Network’ section.

➢ In the Network section, find the ‘Advanced’ option and click on it.

➢ Now, open the ‘DNS’ tab in the Advanced option and click on the + icon to add another DNS server.
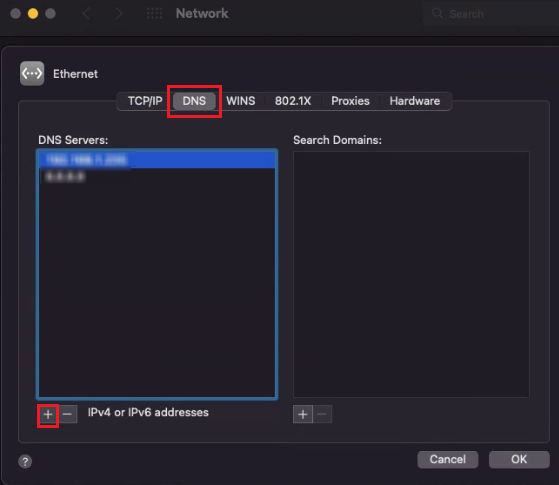
➢ Upon adding Google’s Public DNS server address, tap on ‘OK’ and Apply.
6. Disable DNSSEC for Your Domain
Last but not least, disable DNSSEC for your domain, as you might have lost or misplaced a DNS record of your site. This step is specifically for website owners whose users are facing the “Err_Name_Not_Resolved” error.
DNSSEC is a security extension for your website to block malicious attacks, potential threats, and unwanted access. In case you have switched to a new host, your DNSSEC might be acting up, resulting in your users seeing the error. However, you can remove the error by simply turning off the DNSSEC.
Search for WHOIS and add your website’s URL to know whether or not the DNSSEC is enabled for your website.
As soon as you input your domain name or IP address, you will see an information page on your website. Find the DNSSEC section on the page and see if it states, ‘Signed.’ If it does, turn it off by opening your Domain Registrar Account or Hosting Dashboard.
By now, you should know the gist. Return to the website and check if the error remains unchanged.
Also Read: Fix localhost sent an invalid response ERR SSL_PROTOCOL_ERROR
Conclusion
We hope this knowledge base blog proves to be a valuable resource for you to solve the “Err_Name_Not_Resolved” error in Chrome. Remember, this is a temporary issue you can triumph over by following the above-mentioned methods. Ensure to turn back to the website after implementing each method to confirm the elimination of the issue.