
Running Java applications on your own server gives you more control, better performance, and flexibility for growing projects. If you are using Control Web Panel (CWP), deploying applications with Apache Tomcat becomes much easier when configured correctly.
By integrating Tomcat with CWP:
- You can host Java applications using your domain name
- Manage applications more efficiently
- Deploy .war files quickly
- Configure proxy-based access easily
- Monitor logs and troubleshoot deployment issues
This guide explains the complete deployment process in a beginner-friendly way and helps you understand why each step is necessary.
What You Need Before Starting
Before deploying your Tomcat application, ensure you have:
- A VPS or dedicated server with CWP installed
- Root SSH access to the server
- A registered domain name
- Java is installed on the server
- Your Java application (.war file or project folder)
Why Apache Tomcat Deployment Matters?
Deploying applications properly is important because incorrect configuration can cause:
- Website not loading
- Tomcat service errors
- Port conflicts
- 404 application errors
- Java deployment failures
- Reverse proxy issues
- Slow application performance
With proper deployment, it ensures your application runs smoothly and is accessible through your domain.
Process to Deploy Apache Tomcat Applications in CWP Panel
➢ Step 1: Add Domain in CWP
The first step is to add your domain to the CWP panel, as CWP needs to know which domain will be connected to the Tomcat application. Without adding the domain, Apache and Tomcat cannot route traffic properly.
Steps to follow
➔ Log in to your CWP Panel.
➔ Navigate to the domain management section.
➔ Add your domain under the appropriate user account.
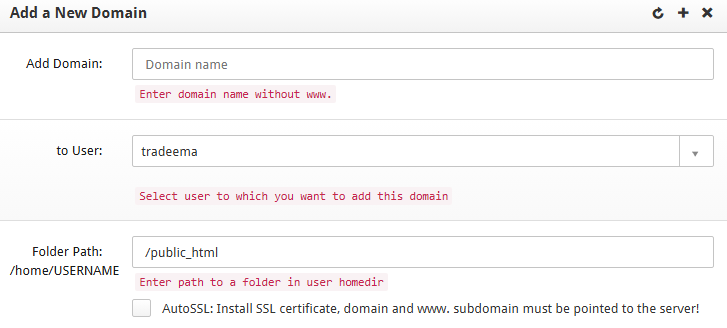
Once added successfully, the domain becomes available for web server configuration!
★ Small Tip:
Use a dedicated domain or subdomain for Java applications.
For example:
- app.yourdomain.com
- portal.yourdomain.com
This keeps your application structure cleaner and easier to manage!
➢ Step 2: Install Apache Tomcat
Now you need to install the Tomcat service from CWP!
Steps to follow
➔ In CWP, go to ‘Tomcat Manager.’
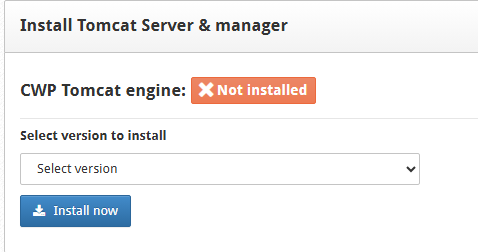
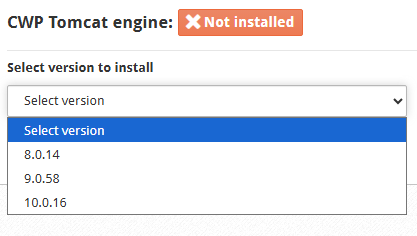
➔ Select the appropriate version & install Apache Tomcat.
➔ Once installation is complete, verify access using:
https://<SERVER_IP>:8080
If the Tomcat page opens successfully, it means the service is running correctly!
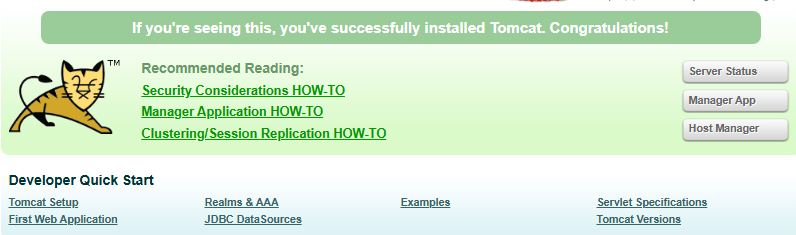
What Does Port 8080 Mean?
By default, Tomcat runs on Port 8080 instead of the standard HTTP port 80.
Later, Apache will act as a reverse proxy, allowing visitors to access your application directly via your domain name without typing: 8080.
➢ Step 3: Configure Domain to Use Tomcat
After installing Tomcat, you must connect your domain with the Tomcat service.
Steps to Follow
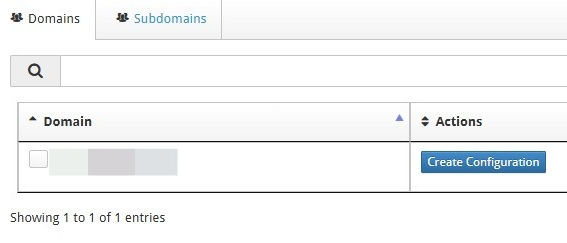
- ➔ Open ‘WebServers Domain Conf’ in CWP.
- ➔ Select the user associated with your domain.
- ➔ Click ‘Create Configuration.’
Configure the following:
| Setting | Value |
| Web Server | Apache → Proxy → Custom Port |
| Port | 8080 |
| Rebuild Webserver Conf on Save | Enabled |
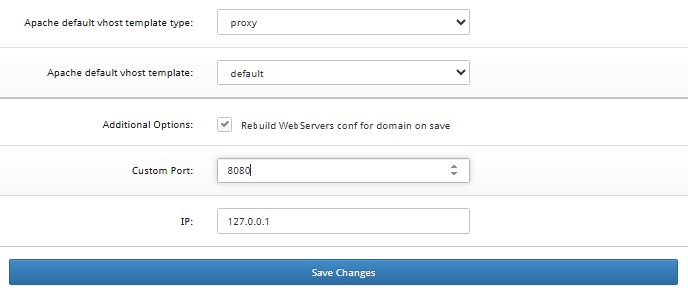
➔ Save the configuration.
What This Configuration Does
➔ This setup creates a reverse proxy connection:
Visitor → Apache → Tomcat → Application
This will help to:
- Improve security
- Hide Tomcat ports
- Use normal domain access
- Handle SSL certificates more easily
★ Pro Tip:
Always enable:
Rebuild webserver conf on save
This ensures Apache automatically updates its configuration files correctly.
➢ Step 4: Deploy Application Files
Now it’s time to upload your Java application!
➔ Access your server using SSH.
➔ Navigate to the Tomcat Directory using the command below:
| cd /usr/local/tomcat/tomcat9/ |
➔ Place your .war file OR extracted project folder inside:
| webapps/ |
You can also use the user’s public_html directory if required!
Difference Between WAR File & Extracted Folder
| Type | Meaning |
| .war file | Compressed Java web application package |
| Extracted Folder | Already unpacked application files |
Tomcat can automatically extract .war files during startup.
★ Small Tip:
Keep application names short and simple.
Example: myapp.war
Avoid: my-final-production-app-v2.war
This is because simple names reduce deployment confusion.
➢ Step 5: Configure Virtual Host in Tomcat
Next, it’s time to configure Tomcat to recognize your domain. As Tomcat needs to know:
- Which domain belongs to which application
- Where application files are located
- How requests should be processed
➔ For this, open the configuration file
| /usr/local/tomcat/tomcat9/conf/server.xml |
➔ Add or Modify the Host Entry
|
Replace the Following Values
- yourdomain.com with your actual domain
- appBase with your application path
Understanding Important Parameters
| Parameter | Purpose |
| autoDeploy=”true” | Automatically deploys applications |
| reloadable=”true” | Reloads application changes automatically |
| unpackWARs=”true” | Extracts WAR files automatically |
| Alias | Allows the WWW version of the domain |
★ Small Tip:
Before editing server.xml, always create a backup:
cp server.xml server.xml.backup
This helps restore the original configuration if something goes wrong.
➢ Step 6: Restart Tomcat Service
After configuration changes, you have to restart Tomcat.
➔ Firstly, you have to stop Tomcat
| sh /usr/local/tomcat/tomcat9/bin/shutdown.sh |
➔ Now, you have to monitor the logs
| tail -f /usr/local/tomcat/tomcat9/logs/catalina.out |
➔ Now, verify whether Tomcat is stopped. Use any of the commands:
| netstat -tulpn | grep java |
OR
| ss -tulpn | grep java |
If no Java process appears, Tomcat has stopped successfully!
➔ Now, you have to start Tomcat
| sh /usr/local/tomcat/tomcat9/bin/startup.sh |
➔ Don’t forget to monitor logs again
| tail -f /usr/local/tomcat/tomcat9/logs/catalina.out |
So, what actually happens during startup?
- .war files get extracted automatically
- Application deployment begins
- Tomcat loads Java classes
- Errors appear directly in logs
- Application context gets initialized
This log monitoring is extremely useful for troubleshooting deployment issues!
➢ Step 7: Final Verification
Once Tomcat starts successfully, test your application!
If everything is configured correctly:
- Your Java application should load
- The domain should work without a port number
- Application pages should open normally
Common Deployment Errors & Fixes
1. Application Shows 404 Error
Possible Causes
- Wrong application path
- Incorrect appBase
- WAR file not extracted
Solution
➔ You have to check:
| /usr/local/tomcat/tomcat9/webapps/ |
2. Domain Opens Default Apache Page
Cause
➔ Apache proxy configuration was not applied properly.
Solution
➔ Rebuild the Apache configuration in CWP, then restart Apache.
3. Tomcat Fails to Start
Cause
➔ Syntax error in server.xml
Solution
➔ Review XML formatting carefully.
Even a missing bracket can stop Tomcat from starting.
4. Port 8080 Already in Use
Cause
➔ Another service is using the same port.
Solution
➔ Stop the conflicting service or change the Tomcat port.
Conclusion
Deploying Apache Tomcat applications in CWP Panel may look technical initially, but once configured properly, the process becomes smooth and manageable.
By correctly installing Tomcat, configuring Apache proxy settings, deploying application files, setting up virtual hosts, and monitoring logs, you can run Java applications efficiently using your own domain name.
The best part about using CWP with Tomcat is that it combines the power of Linux server management with a user-friendly interface, making Java application hosting much easier even for beginners.
With proper deployment practices and regular monitoring, your Tomcat applications can run securely, efficiently, and reliably over the long term.