
When you plan to host a website, web application, API, or even an internal company portal on a Windows-based system, you need a reliable web server. In the Windows ecosystem, that role is entirely handled by Internet Information Services (IIS).
Whether you are setting up a development server, deploying a live production website, or configuring a hosting environment for clients, installing IIS is the first and most important step.
In this article, we will walk you through three clear and properly explained methods to install IIS in Windows Server:
- Using Server Manager (GUI method)
- Using PowerShell
- Using Command Prompt (DISM)
Each method is explained step by step in simple language so you can follow along easily.
Also Read: How to Install GCC Compiler on Windows?
Methods to Install IIS Manager in Windows Server
Let’s discuss 3 methods for installing IIS Manager on Windows Server.
Here they are:
Method 1: Install IIS Using Server Manager (GUI Method)
Installing IIS via Server Manager is the easiest and most common method. Let’s go through the steps for installation:
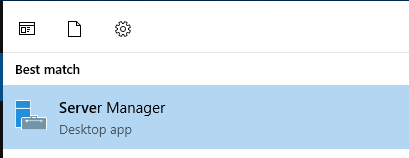
➔ First, open Server Manager by logging in to your Windows Server, then click the ‘Start’ button.
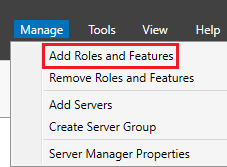
➔ In Server Manager Dashboard, click on ‘Manage’ (top-right corner).

➔ In that, select ‘Add Roles and Features.’
As a result, the Add Roles and Features Wizard will open.
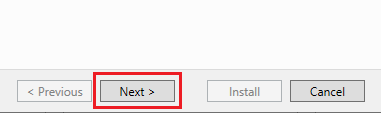
➔ In that, click ‘Next.’
➔ Now, you have to choose a ‘Role-based or feature-based installation.’
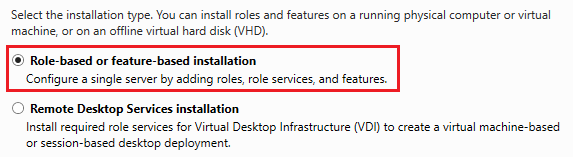
➔ After choosing, again click ‘Next.’

➔ From the list, check ‘Web Server (IIS).’
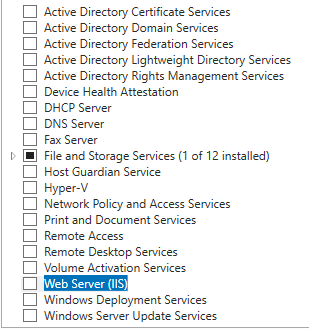
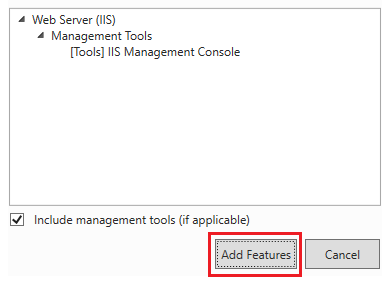
➔ After that, a pop-up will appear asking you to add the required features.
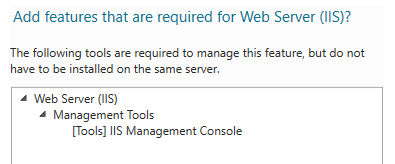
➔ You have to click ‘Add Features’ & then click ‘Next.’
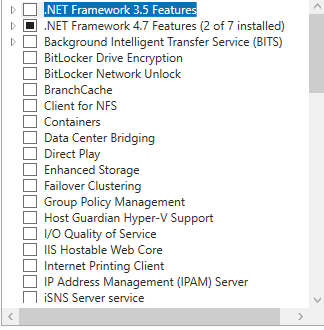
➔ You can leave the default features selected.
➔ Click ‘Next.’
➔ After clicking ‘Next’, you can select additional IIS services like:
- Static Content
- Default Document
- HTTP Errors
- ASP.NET
- CGI
- ISAPI Extensions
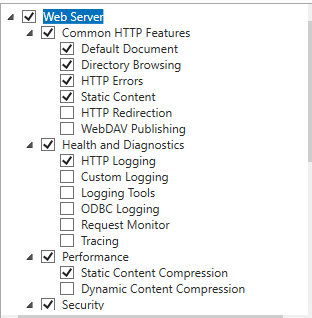
For basic website hosting, the default options are enough.
➔ Once selection is done, click ‘Next.’
➔ Confirm the Installation by clicking ‘Install.’

Now, wait for the installation to complete, then click ‘Close’ when done.
Also Read: How to Launch Windows Internet Information (IIS) Manager?
Method 2: Install IIS Using PowerShell
Installing IIS Manager using PowerShell is faster and more useful for administrators who prefer command-line installation.
➔ To install via PowerShell, open PowerShell as an Administrator by right-clicking ‘Start.’
➔ In that click, ‘Windows PowerShell (Admin).’
➔ You have to type the following command & press ‘Enter.’
| Install-WindowsFeature -Name Web-Server -IncludeManagementTools |
➔ The system will install IIS along with the required components.
➔ Once completed, you will see:
| Success |
Also Read: Windows PowerShell Basic Commands Cheatsheet For You
Method 3: Install IIS Using Command Prompt (DISM)
Installing IIS using the Command Prompt is helpful in minimal environments or when Server Manager is unavailable.
➔ To begin, you have to open ‘Command Prompt as Administrator.’
➔ In that, run DISM Command & Press ‘Enter.’
| DISM /Online /Enable-Feature /FeatureName:IIS-WebServerRole /All |
➔ Wait for Completion & DISM will enable IIS & related features.
Now, restart the server if prompted!
Also Read: How to Migrate an IIS Website to Another Server?
How to Check if IIS Manager is Installed
➔ Open the browser & check for the URL.
| http://your-ip |
If the IIS welcome page appears, installation is successful.
Also Read: How to Install the SSL in IIS on Windows VPS?
Common Optional Features You May Need
Depending on your application requirements, you may also enable:
- ASP.NET
- .NET Extensibility
- CGI
- WebSocket Protocol
- FTP Server
These can be added at any time using the Add Roles and Features Wizard.
Also Read: How Can You Find The Location of the Windows Log Files?

Conclusion
Installing Internet Information Services (IIS) in Windows Server is a foundational task for anyone planning to host websites or web applications in a Microsoft environment. The installation process is straightforward, but choosing the right method depends on your working style and server environment.
- Use Server Manager if you prefer a graphical interface.
- Use PowerShell for faster, script-based deployments.
- Use DISM when working in minimal or restricted environments.
Once IIS is installed, your server can host websites, applications, and services efficiently. However, installation is just the beginning. For a production-ready setup, you should also configure firewall rules, enable necessary role services, apply security best practices, and install SSL certificates.
With IIS properly installed and configured, your Windows Server is now ready to serve web traffic reliably and securely.