
Sometimes, managing a website feels like repeating the same work again and again. For example, updating headers, footers, menus, announcements, or banners on every page can quickly become time-consuming.
This is where Server Side Includes (SSI) becomes useful!
SSI is one of those simple yet powerful features that can make website management easier, especially for static HTML websites. Instead of editing multiple pages individually, SSI lets you place reusable content in a single file and automatically display it across multiple pages of your website.
If your website is hosted on a cPanel hosting account, enabling SSI is usually quick and straightforward.
In this guide, you’ll learn:
- Why websites use SSI
- Benefits of enabling SSI
- How to enable SSI on a cPanel domain
- Important tips while using SSI
- Common mistakes to avoid
This article is written in simple language, so even beginners can follow it easily.
Also Read: How to Change the FTP Password in cPanel?
Why is SSI Required?
SSI is useful for websites with repetitive content across multiple pages.
Common Uses of SSI:
- Website headers
- Footers
- Navigation menus
- Sidebar sections
- Announcement bars
- Copyright notices
- Contact information
- Reusable banners
Also Read: How to Block Spam Emails in cPanel
What are the Benefits of Using SSI
1. Faster Website Updates
The amazing benefit of using SSI is that you can update common sections, such as headers, footers, and menus, from a single file. Once edited, the changes automatically appear across all pages that include the file.
2. Saves Time in Website Management
With SSI, instead of editing multiple HTML pages manually, you reduce repetitive work and make website maintenance much quicker and easier.
3. Keeps Website Design Consistent
Using shared include files helps maintain the same layout, navigation, and branding across the entire website without missing any page updates.
4. Lightweight & Server Friendly
SSI is a simple server-side feature that uses far fewer resources than heavy CMS platforms or dynamic frameworks, making it suitable for lightweight websites.
5. Cleaner File Structure
With SSI, website files become more organized because reusable sections can be stored separately inside dedicated folders like /includes/.
6. Reduces Human Errors
When managing large static websites, manually editing every page can lead to mistakes. With SSI, it minimizes this risk by centralizing repeated content.
7. Helpful for Static HTML Websites
SSI is especially useful for websites built using plain HTML, where dynamic features like PHP or CMS systems are not being used.
8. Improves Website Maintenance
With SSI, adding notices, banners, announcements, or policy updates becomes easier because changes can be managed centrally without touching every webpage individually.
Also Read: Simple Steps to Set Up Email Forwarding in cPanel
Steps to Enable SSI on cPanel Domain
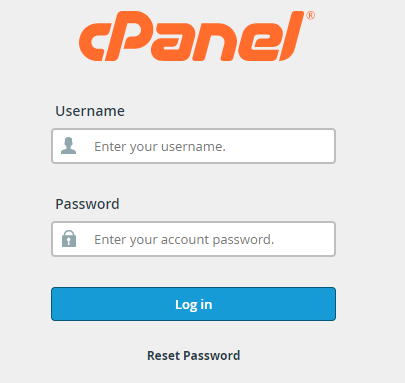
➔ Login to cPanel with your username & password.
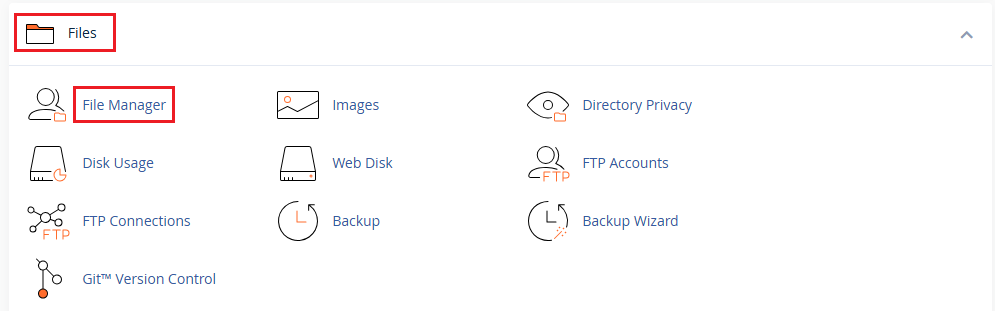
➔ In that, go to the ‘Files’ section & click on ‘File Manager’.
➔ Now, you have to navigate to your domain folder.
➔ In that, look for the file named ‘.htaccess’.
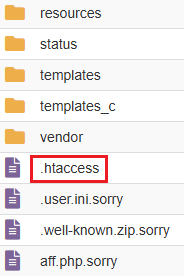
If you cannot see it:
➔ Click ‘Settings’ (On Top-Right Corner)

➔ In that, enable ‘Show Hidden Files’

➔ Now, you have to open the .htaccess file and add the following code:
| AddType text/html .shtml AddHandler server-parsed.shtml Options +Includes |
➔ Once done, save the file.
➢ What This Code Does
AddType text/html .shtml: This tells the server to treat .shtml files as HTML pages.
AddHandler server-parsed .shtml: This enables SSI parsing on .shtml files.
Options +Includes: This activates Server Side Includes functionality.
★ Small Tip
If you only want SSI for selected pages, use the .shtml extension only on those files instead of enabling it globally.
This keeps your website cleaner and slightly improves performance.
➔ Now, you have to rename your HTML File to .shtml
➔ Now you can use SSI commands inside your webpage.
For Example:
★ Important Point
After enabling SSI, clear your browser cache if changes do not appear immediately.
Sometimes browsers temporarily store old page versions.
Also Read: How to Create a Basic SPF Record in cPanel?
Common SSI Problems & Fixes
1. SSI Code Appears as Plain Text
➢ Cause for this:
It occurs because SSI is not enabled properly.
➢ How to Fix
You have to check:
- .htaccess syntax
- File extension (.shtml)
- Apache includes permission
2. Internal Server Error
➢ Cause for this:
It occurs due to incorrect .htaccess configuration.
➢ How to Fix
You have to carefully recheck the SSI code formatting. Even one extra character can break Apache rules.
3. Included File Not Showing
➢ Cause for this:
It occurs due to an incorrect file path.
➢ How to Fix
Verify the filename and folder location.
★ Security Tip: While Using SSI
Avoid allowing public uploads inside SSI-enabled directories. Improper SSI usage can create security risks if malicious scripts are inadvertently included.
Pro Tip for Better Website Management
You have to create separate folders like:
| /includes/ |
Then store reusable files inside it:
| /includes/header.html /includes/footer.html /includes/menu.html |
This will help you to keep your website organized and easier to manage in the future.
Also Read: How to Decrease Inode Usage in cPanel?

Manage files, databases, emails, and applications using our feature-rich cPanel hosting.
Conclusion
Server Side Includes (SSI) is a simple yet highly useful feature for efficiently managing reusable website content. Instead of manually updating every page, SSI lets you maintain common sections such as headers, footers, and menus in a single file.
Enabling SSI on a cPanel domain mainly involves:
- Accessing File Manager
- Editing the .htaccess file
- Activating SSI rules
- Using .shtml extensions
- Adding SSI include commands
For beginners managing static websites, SSI can save significant time while keeping website maintenance clean and organized.
When used properly, it becomes a lightweight, effective way to simplify website management without requiring complex development frameworks or CMS platforms.