
Have you ever noticed your emails landing in spam folders even when they are genuine? Or worried that someone might misuse your domain name to send fake emails?
That is exactly where DMARC comes into the picture!
Email communication is one of the most important parts of any online business. Whether you send invoices, newsletters, client replies, or support emails, your domain reputation matters. Without proper email authentication, cybercriminals can spoof your domain and send fraudulent emails that appear to be from you.
DMARC helps solve this problem!
By adding DMARC to your domain through cPanel, you can improve email security, increase email deliverability, and protect your brand reputation. The best part is that enabling DMARC in cPanel is simple and requires no advanced technical knowledge.
In this guide, you will learn:
- What DMARC is
- Why DMARC is important
- How DMARC works
- Step-by-step process to add DMARC using cPanel
- Small expert tips to make your setup stronger
Also Read: What is Email Routing in cPanel & How to Do it?
What is DMARC?
DMARC stands for Domain-based Message Authentication, Reporting & Conformance.
It is an email authentication protocol that helps protect your domain from:
- Email spoofing
- Phishing attacks
- Fake email sending
- Unauthorized email usage
DMARC works together with SPF & DKIM
These technologies verify whether an email is genuinely sent from your domain.
Also Read: How to Block Spam Emails in cPanel?
Why is DMARC Important?
Adding DMARC to your domain provides multiple benefits:
1. Protects Your Domain Reputation
The best part is that it prevents hackers from sending fake emails using your domain name.
2. Improves Email Deliverability
Email providers like Google and Microsoft trust authenticated emails more, which helps your emails land in inboxes instead of spam folders.
3. Reduces Phishing Risks
With the help of DMARC, suspicious emails that fail authentication checks are blocked.
4. Gives Email Reports
With DMARC, you will receive reports about who is sending emails using your domain.
5. Builds Customer Trust
If your domain is protected, people feel more confident opening emails.
Also Read: Simple Steps to Set Up Email Forwarding in cPanel?
Before You Add DMARC in cPanel
Before configuring DMARC, make sure:
- SPF record is already added
- DKIM is enabled
- You have access to cPanel
- Your domain DNS is managed through cPanel
★ Quick Tip
DMARC works best only when SPF and DKIM are properly configured first.
Also Read: How to Create a Basic SPF Record in cPanel?
How Does DMARC Work?
DMARC checks incoming emails using SPF and DKIM verification.
If an email fails authentication, DMARC tells the receiving mail server what action to take.
The policy can be:
| Policy | Meaning |
| none | Monitor emails only |
| quarantine | Send suspicious emails to spam |
| reject | Completely block fake emails |
Also Read: How to Add a TXT Record to the DNS cPanel?
Steps to Add DMARC to Your Domain Using cPanel
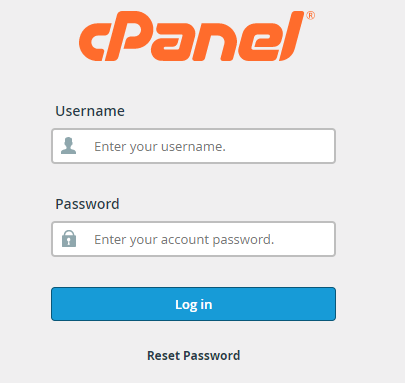
➔ First, log in to your cPanel account using your credentials.
➔ Inside cPanel, check for ‘Zone Editor’ under the ‘Domains’ section and open it!
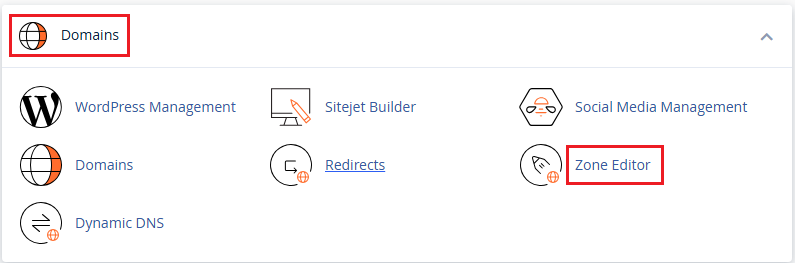
The Zone Editor allows you to manage DNS records of your domain, such as:
- A Records
- MX Records
- TXT Records
- SPF
- DMARC
Since DMARC is added as a TXT record, you need to create it there.
➔ Inside the Zone Editor, you will see a list of domains connected to your hosting account. From that, find the domain where you want to add DMARC.
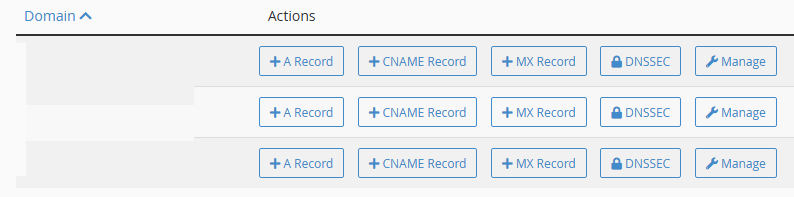
➔ Now, click on ‘Manage’

This opens the DNS management section of your domain.
➔ You have to click on ‘Add Record’

➔ Add a record in the ‘TXT’ record.
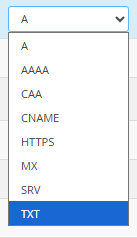
➔ Here, you have to enter the DMARC Record Details. Just enter the following values carefully:
| Field | Value |
| Type | TXT |
| Name | _dmarc |
| TTL | 14400 (default is usually fine) |
| TXT Value | v=DMARC1; p=none; |
➢ Understanding These Values
- ★ Name: _dmarc
This tells DNS that the record is specifically for DMARC authentication.
- ★ TTL: 14400
TTL means Time To Live.
It defines how long DNS servers should cache the record before checking for updates again.
You can usually keep the default value.
- ★ TXT Value: v=DMARC1; p=none;
This is the actual DMARC policy.
What This Record Means
| Part | Purpose |
| v=DMARC1 | Defines the DMARC version |
| p=none | Monitor emails without blocking them |
★ Small Tip
Start with p=none first to monitor email activity safely before moving to stricter policies.
➢ Recommended DMARC Policies
1. Beginner Setup (Safe Monitoring Mode)
| v=DMARC1; p=none; |
This policy only monitors email activity.
This is Best For:
- New DMARC users
- Testing configuration
- Monitoring email sources
2. Medium Protection
| v=DMARC1; p=quarantine; |
This policy moves suspicious emails to spam folders.
This is best for domains with properly configured SPF and DKIM.
3. Maximum Protection
| v=DMARC1; p=reject; |
With this policy, fake emails get completely rejected.
This is best for domains with fully tested email authentication.
★ Important Tip
Do not start directly with p=reject unless you are sure all legitimate email services are properly authenticated.
➔ After adding the DMARC record, click ‘Save.’
That’s it! Your DNS settings will now update!
Now, DNS changes may take some time to update globally.
Example of a Complete DMARC Record
| Host/Name: _dmarc
Type: TXT Value: v=DMARC1; p=none; |
Optional Advanced DMARC Record
You can also receive DMARC reports at your email address.
Example:
| v=DMARC1; p=quarantine; rua=mailto:admin@yourdomain.com; |
- ★ What This Does
- rua= sends DMARC reports to your email address
- It helps monitor suspicious email activity
How to Check Whether DMARC is Working?
You can verify your DMARC setup using online DMARC checker tools.
The tool checks whether:
- DMARC exists
- SPF is valid
- DKIM is configured properly or not
You can also use command-line DNS lookup tools.
Also Read: How to Set Up & Manage Email Filters in cPanel?
Common DMARC Errors & Solutions
1. SPF Alignment Failure
➔ Cause:
The sending server is not authorized.
➔ Solution:
Update your SPF record properly.
2. DKIM Failure
➔ Cause:
DKIM signature mismatch.
➔ Solution:
Re-enable DKIM from cPanel.
3. DMARC Record Not Found
➔ Cause:
DMARC TXT record is missing.
➔ Solution:
Add the correct TXT record in DNS settings.
Also Read: Quickly Create a Catch-all Email Address in cPanel
Expert Tips for Better Email Security
➢ Tip 1:
Always use professional email addresses, such as support@yourdomain.com, instead of free email services for business communication.
➢ Tip 2:
Completely avoid multiple SPF records for the same domain. There should be only one SPF TXT record.
➢ Tip 3:
It is important to monitor email deliverability after enabling stricter DMARC policies.
➢ Tip 4:
Update DMARC settings whenever you add new email services, like:
- Email marketing tools
- CRM systems
- Third-party mail providers
Also Read: Is Your Cpanel Not Receiving Emails-What to Do?

Manage files, databases, emails, and applications using our feature-rich cPanel hosting.
Conclusion
DMARC is no longer optional for modern domains. It is one of the most important email security standards that helps protect your domain from spoofing, phishing, and unauthorized email usage.
By adding DMARC through cPanel, you can improve:
- Email security
- Inbox delivery rates
- Brand trust
- Domain reputation
The process is simple, but the impact is powerful!